Supplies needed: (2) Ivory card blanks *Ivory card stock *Pattern paper in ivory and black *Black Bling medalian ribbon, silver/white pull bow ribbon, and small ivory pull ribbon from Mai Ammy * White/black swirl ribbon *Pearl medalion *Hot glue gun/ extra glue, foam tape, and regular adhesive *Scissors and paper trimmer * stamp from Great Impression April stamp of the month and black ink.
Card one: Bling frame
Directions: Fold one card blank to make base. *Cut (2) 4x5.25" from pattern paper and adhere to front of base and inside of base. *Cut (1) 3.75x5" from ivory card stock and adhere to inside over pattern paper. *Stamp words on ivory card stock and cut as close as possible to words, then set aside. *Cut bling ribbon 6 medalions x 8 medalions. Cut out center area, leaving a row all the way around with a 4 square in each corner. Set the center to the side as it will be used on card two. Use hot glue to adhere to card base front, it will take up most of the card front. *Cut 5.5" of swirl ribbon and dove tail the ends then adhere to center of card front. *Place foam tape to underside of the stamped image and adhere to swirl ribbon.
*Write your message inside and give a way.
Card Two: pull ribbon & bling
Directions: Fold card blank.
*Cut (2) 4x5.25" from pattern paper and adhere to front and inside of card blank *Cut (1) 3.75x5" from ivory card stock and stamp words in center, then adhere to inside centering over pattern paper *Hot glue extra bling ribbon from card one to center of card front * Cut 12" from both silver/white and ivory pull ribbons. * Take the ends of silver/white ribbon and put them togather, then pull on the small white ribbon that is on the bottom to make a rosette, Tie small ribbon togather in a tight knot and trim. Now hot glue to center of card front. repeat with ivory ribbon. *Hot glue pearl to center of rosette. *Write your message in center and give a way.
Thank you and enjoy.
February 2014- Great Impressions Stamp of the Month class cards

Supplies needed: *Great Impressions stamps -G498s forever friends, C462s when you're around, and C463s I need you, also- D477s 4leaf clover, D476s clover boarder, and E828s lucky to have. *ink- Brillance pearlesent Poppy and pearlesent Thyme. * paper- DCWV grn woodland wild flowers, Bazzil pear crush card stock, and white card stock. *buttons from Multi craft. *ribbon- citrus lime with wire. * scissors, adhesive, paper trimmer, stamp block, and coloring system.
Start instructions: * Cut 2- 8.5x5.5" in pear crush. These are the card blanks. save scraps. *Cut 4- 5.24x4" in woodland flowers (two for each card as base mats). save scraps.
Card one- Friends
Instructions: *Stamp with Poppy ink on white- forever friends, when your around, and I need you. Then color to your liking and set aside. * Fold one card blank in half and adhere one woodland flower to front and one to inside front. *Cut out of pear scrap- 2 =5x3.75". On one, adhere ribbon toward top, leaving about 1/4" from top, then adhere to front-center. Adhere second pear piece to inside front. * Cut out stamped images as close as possible to form rectangles. Adhere forever friends to front under ribbon and toward the center. Mat words- when your around to a scrap of flowers and use foam tape to adhere over ribbon center. Use glue dots to adhere buttons to front of card. Adhere I need you words to center of inside and write a personal message to complete.
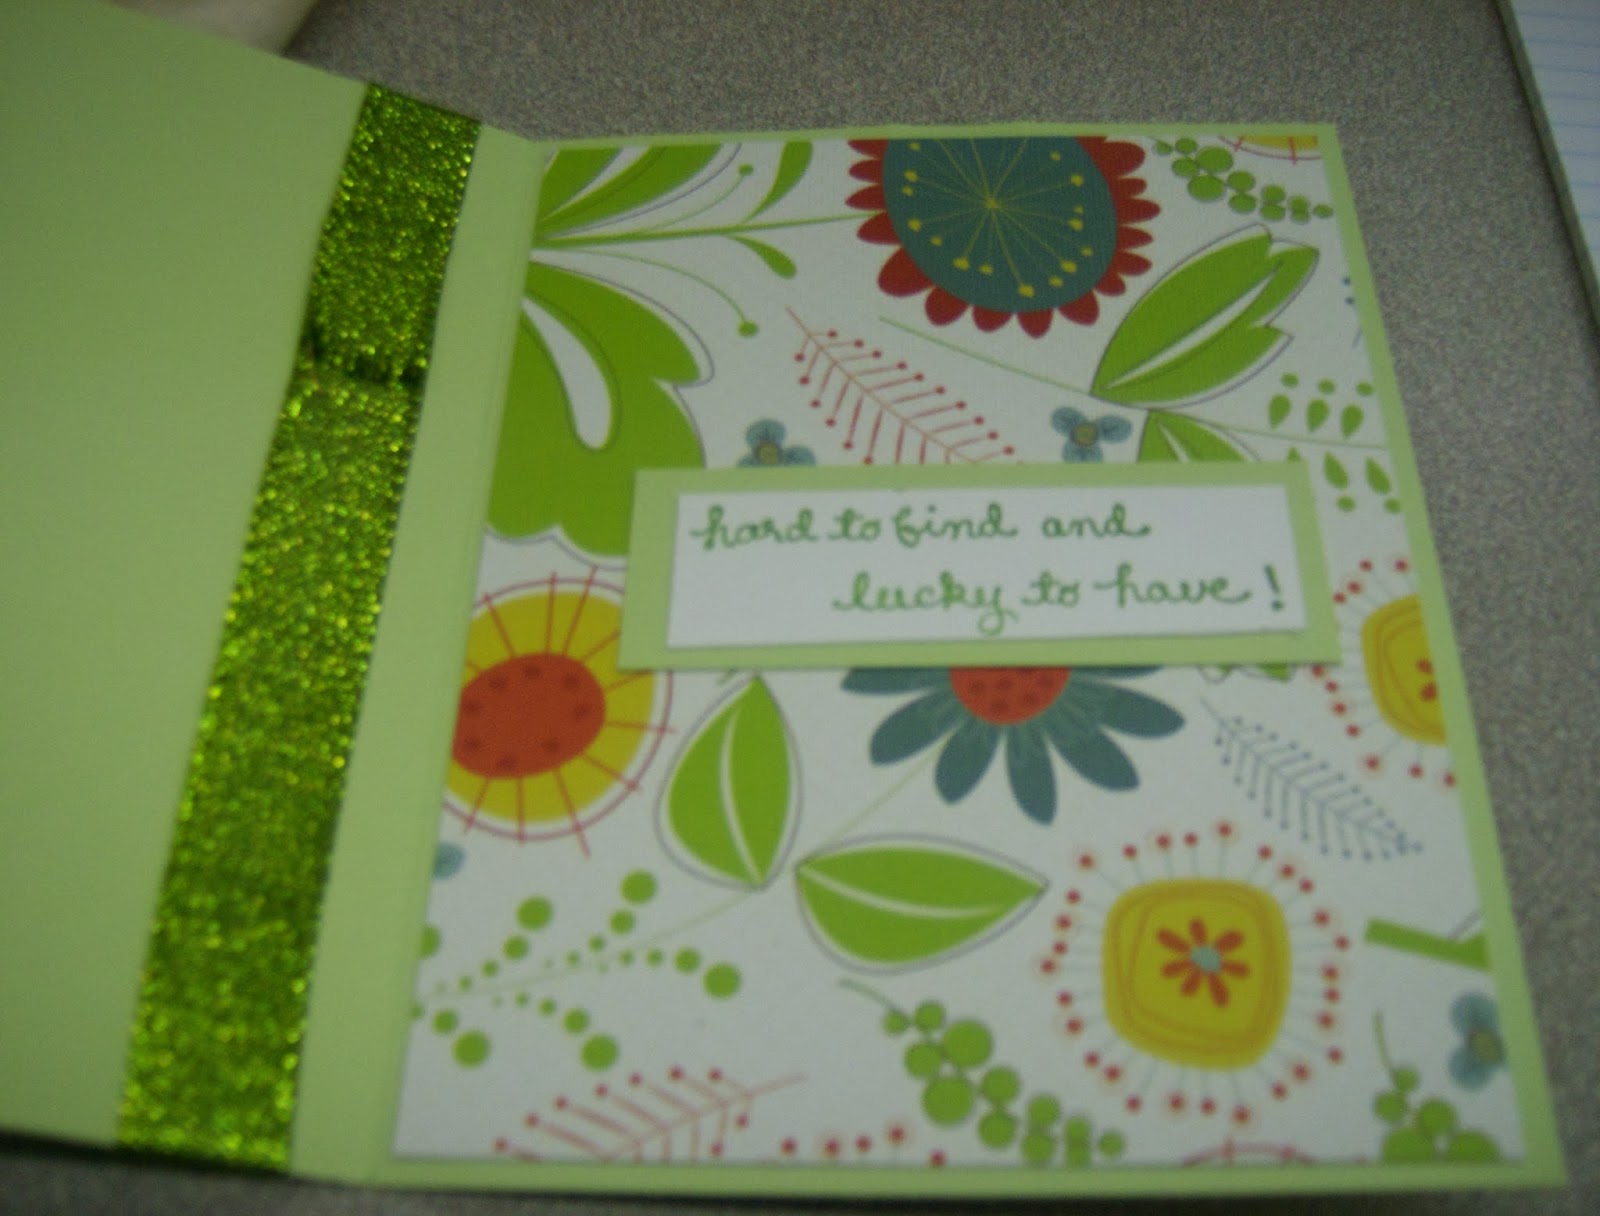
Card two- Clover friend.
Instructions: * Stamp with Thyme on white- 4leaf clover, clover boarder and lucky to have. Color to your liking and set aside. *Fold second card blank in half and adhere woodland flower pieces to front and inside front. Adhere ribbon to front of card near fold, leaving about a 1/4" of flowers showing. NOTE: wrap ribbon all the way around to inside. *Cut out stamps as close as possible. (clover and words in a square, boarder is fussy cut.). Cut words in half under the "a four leaf clover...". Use scraps of pear paper to mat all stamps. *Use foam tape to adhere clover to center front of card at an angle. *Adhere first part of words to top of card and clover boarder to bottom. * Adhere second part of words to inside. * Add personal message to complete.
Thank you and enjoy
Tammy Maddux.


No comments:
Post a Comment